Wednesday, March 12, 2014

What'll Ya Have???

Like I said, I was looking for something to go in the hallway, in the spot you can see below.

I went out to the local consignment stores, looking for something to make into a bar. It was a heavenly day for shopping :).  I didn't realize that Berkley is a resale/consignment/antique mecca in metro-Detroit but apparently it is.  Anyway, I wandered around OddFellows Antiques for a while.  There is tons of amazing stuff.  The only problem that I have is that everything is an antique and doesn't necessarily need any refinishing so it is priced accordingly.  This means that it's usually out of my budget.  I ended up finding an old cabinet that would work and was in my price range, but I wanted to check the rest of the stores around the area to make sure that I was making the right choice.  I checked the thrift store, which is pretty much a Salvation Army, and then went to the furniture consignment store that shares a space with the local lunch cafe (really good food and very quaint, another reason why I love Berkley).  I looked through the whole space and on my way out, I found the perfect piece.  It was actually pretty ugly, but it's the perfect size for the space.  It used to be an old wash basin and had the original tub in the top section.  


The best part was that I got it for 50% off! I took it home and talked with Eric, and we decided that we wanted to go with stain.  I took off the door and all the hardware.  We also took the center piece out on the door and cut off some of the curves.  The super country vibe isn't really our style so I went to work on making it more us.  I also jigsawed out some other little decorative windows.  After all that, I sanded the entire thing and restained it to a redder color.  After staining, I put chicken wire in all of the windows, which is kind of an old school thing to do with bars.  Here's what it looked like when I was done before I took it upstairs.

Here it is upstairs, but not quite done.  We loaded the alcohol in the bar, but I still had some decorating to do. This was perfect because we put all of the bottles and some of the other bar essentials (i.e. margarita salt, margarita glasses and shot glasses) in the bottom section.  In the top section, I put some of the wine glasses, tumblers, and beer steins.  I left the top section for decorative items and for the actual drink mixing.  I think it turned out pretty well.  I spent $37 on the cabinet and about $10 on the chicken wire.  I also bought the hardware for a couple bucks.  Overall, I think it was well worth it.  I can't wait until I have a full workshop with spare parts laying around so I don't have to go to the store for every little thing.  Either way, I think it was well worth it.  Now for some decorating :)

So we had this picture hanging already that we got at a local art fair last year.  Eric is completely obsessed with our new dog, Rex so I went online and we found the same artist's version of a min pin as seen below.

In addition to the pictures, I went to TJ Maxx and Dollar Tree to buy some little decorative pieces to keep booze in and to keep the bottle openers and wine stoppers in.  We are really happy with our project :)


Now, everyone knows winter has lasted forrrrrrrreeeeeeeeevvvvvveeeeerrrrrrrr! My next couple projects are some spring decorations to put up in the house as soon as it stops snowing! I'll keep you posted!


Sunday, February 23, 2014

Ready for Dinner Guests!

Welcome back! Sorry it has been a while! I've been busy with school, and the weather has really put a damper on my home-makeover-spirit!

Anyway, I told you that we finished the bench in the kitchen and that the next project was to find the perfect table to fit the space.  Before we had a square table with four legs in each corner so it was pretty hard to scoot your legs around when you wanted to sit on the bench.  It was an old laminate wood table that my Naunie got from the previous owner of her condo so there wasn't much sentimentality to it.  So needing a new table, I hit Craigslist and the local antique stores.  If you don't use Craigslist, I encourage you too, but make sure that you don't meet with some creeper on your own.  Just my little Craigslist safety warning. 

Anyway, there were a lot of round tables online, but we had a few requirements: had to have a leaf, had to have a pedestal base, and had to be less than 45" in diameter.  These made it a little bit harder to find the right table, but Eric had the ultimate faith and convinced me to pass up a few that were good fits but not perfect.  I found the perfect table in Wixom so I headed out there with my neighbor and bought the beaut.  It was a lovely brown color :(.  You can see the color that it started below.  

We started by laying out our drop cloth that looked a lot like a Dexter episode.  Then we sanded...a lot! I bought myself a power sander after I quickly realized that sanding by hand was a huge pain in the butt.  Plus, I figured I would use it on my next project (which I have).  Now I have a sander, staple gun, and Dremel. FYI: Eric is required to log them in and out if he wants to use my tools, just as Papa Walrus has taught me.  Here you can see the sanding process:


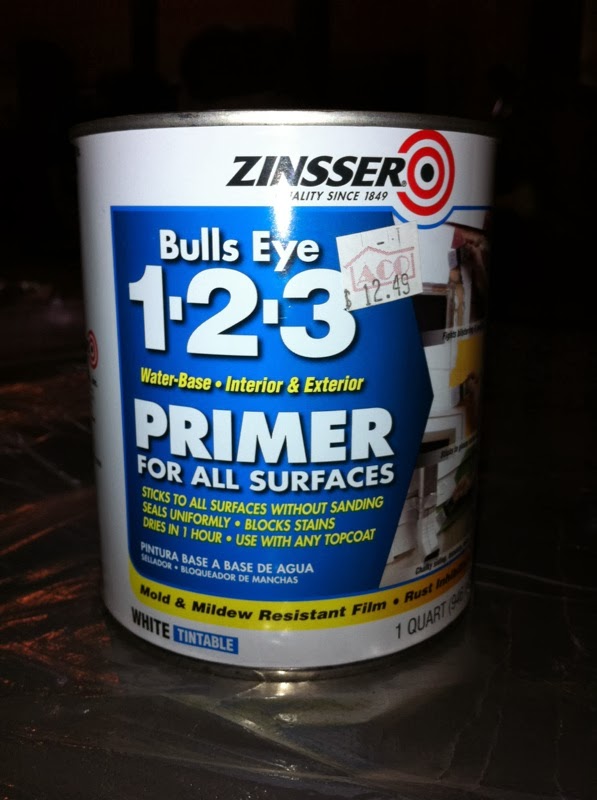
After a lot of sanding, I primed the pieces.  It put on two coats of Zinsser Primer.  It is amazing.  A lot of people use KILZ for projects, but I have only had good results with this so I'm sticking to it.  It's not very expensive either.

We primed it twice, and then I put on two coats of paint.  Then I polyurethaned it three or four times, only to realize that it left a weird yellow sheen on the table.  I sanded the poly off and then put another coat of paint on it and waited for it to dry.  Here's the finished product in the kitchen:


What do you think? We really like it! It fits a lot of people and now you can swing your legs around.  I put a lot of paint on it so we hope that it will be durable and last a while! We made a few other changes since last time.  We hung some plates on the wall as decoration.  I found them on super clearance at Target and couldn't pass it up.  I think they are fun and match the whole style of the kitchen.


When I was picking up the table from Wixom, the guy had a bunch of other stuff so I got these two boxes for the wall.  It's the perfect place for our butter and the adorable salt and pepper shakers (Yes, I am obsessed with my dogs).  We have minimal counter space so moving anything from the counters is definitely helpful.


My next project is the space seen below.  It's a little alcove in our hallway that is wasted space right now.  I think it would be the perfect place for a little bar cart/shelf.  I want something little that can hold bottles and our glasses and could be used to mix drinks when we have people over.  If we can get the wine glasses and tumblers out of the kitchen cupboards, it would open a lot of space for other kitchen things.  I went looking at the resale shops in Berkley yesterday so I'll keep you posted on what I found and how it goes :)


Sunday, January 19, 2014

Weekend Warriors!

Hey Everyone!

Eric and I finished one of our first big house projects! Yay! We took three trips to Home Depot in one day so I think I can officially say that we're homeowners and should be welcomed to the club :)

I read on a couple of websites that building in seating is a really great way to add more seating to a small space.  Naturally, I convinced Eric that this was a great idea.  With the hubby and engineer for the project on board for the challenge, we got started.  Eric pulled out some graph paper and started to plan.  As expected, he drew it from three different angles, two of which I have no idea how to understand.

Just learned that the bottom plan is called an isometric view

This is a plan view

And this is a section view.  Thank God for that useful knowledge ;)

After the planning and one of the first of many, many shopping trips, we got started building the frame.  After buying and borrowing some tools, we cut all the pieces that we needed and then decided to build. Here's Eric in the basement looking very happy after his first injury, a minor gouge out of his hand.


Then we took the completed frame upstairs and anchored it to the walls that way our guests don't go crashing to the ground.


Next, we covered the frame with wainscoting and trim with the help of our two little doggies...pictures to come.  We also upholstered the plywood top.  Now everyone knows I love a barg so I was excited to find the fabric for $6/yard at Walmart.  Instead of going to Joann's for the really expensive foam, we bought a $10 mattress topper from Walmart.  It was a twin size so we grabbed two of them to fold it over on itself for a little extra comfort.  Here's Lucy helping us with the stapling :)  The best part of upholstering for me was that I finally bought myself a staple gun! Yay! Every crafty girl needs one!


Here's the bench, prior to painting.  Wainscoting comes in 8 foot by 4 foot sheets so we needed to cover the seams.

This is the finished project! Please don't look too closely though :) We love it.  It is the perfect height and size.  The upholstered pieces come right off so I can store all sorts of things under the benches.  We also added some valences to the top of the windows and made some pillows with leftover stuffing from the bench and fabric from the kitchen chairs.  Overall, we think it really works with our little house.  Our next step is to find the perfect table for the space.  Right now, our table is a square with four legs that get in the way when squeezing in and out of the bench. We want a pedestal table to fix the problem so I have been checking Craigslist and the local consignment and antique stores.


Things We Learned:
  • There is absolutely no way to do a home improvement project without multiple trips to Home Depot
  • Plaster walls are made of steel!
  • Wood filler is your best friend


Thursday, January 2, 2014

A First Time Homeowner's DIY Blog

I've decided to start writing a blog, mainly focused on the crafts and home improvements that I love to do in my spare time.  Occasionally, my husband gets wrangled in to my projects so he may pop up in here too.  Having a couple readers would be nice, but with all the amazing blogs out there, I mainly see this as a way for me to keep track of all the progress that we make on our house.

My husband and I bought our first home about a month and a half ago and are having a lot of fun making decisions and changes together.  It's a small (around 800 square feet) two bedroom house with one bathroom that's typical in our area.  In fact, it's so typical that pretty much every house on the street has the same basic layout.  It's particularly convenient because you can see what changes other people have made inside or outside before deciding if you want to make that change.  Better to let the neighbors test out that new porch or closet before we do ;) Anyway, because it's small, or as my husband says "cozy", we have to come up with more creative ways store things, while keeping it comfortable and still us.


Our first big project is the kitchen.  Like every other person our age, we are paying student loans and now have a lovely mortgage :) so there is no complete renovation in the budget.  Instead, we are opting for some smaller changes to make the kitchen and eat-in dining area more practical for us.   We started working on some built in seating so I'll post more about that when we finish, but for now, here are some pictures from before we moved in.